After we moved out of our former home and into my parent's home I took a blogging break minus a few family posts here and there. I spent the summer praying and obsessively talking to my husband about our family blog and the possibility of starting a new blog. I kept thinking about what I wanted to blog about and even though "food" seemed an easy choice there are tons of food blogs and it didn't encompass the new home we were about to have and what we wanted to do with our home.
What is it that we want to do with our home? Well, this is "the home" which means we aren't going anywhere for a good while. This is it. No more checking the MLS listings and counting out pennies to see what we can afford. Our new home has enough room in it for us to grow and expand as a family (no I'm not pregnant) and have room to entertain. But not just entertaining. Entertaining with a purpose.
For awhile Korey and I have been talking about using our home to bless others. For example, we've already signed up to host DNow in November. Actually, I signed us up before we ever moved in. Crazy, I know. I grew up going to DNow as a youth in our church and I have fond memories and it's always been one of my desires to be able to host. We also really want to get to know our neighbors, invite them over for dinner, and build a relationship with them in the hope that we can share God with them. Both of us have been overseas to share God's love with people but we feel a burden for us to just go across the street and get to know people.
All this to say that I decided I wanted to start a blog about this process. I wanted it to be separate from our personal, family blog which is not going away. So yes, I will have two blogs and no, I don't know how I'm going to keep up with them when I work full-time outside of the home and I'm a parent to a toddler. But try I must.
What's in the blog? Well, because I like to multi-task there will be a chronicle on decorating, organizing, entertaining, and feeding others. It will be about how I make our home a place to welcome others. I don't claim to know everything or even have the necessary skills. I'm just jumping out into the deep end and seeing what happens.
Our family blog is hosted on Blogger but after doing some research I started the new blog on Wordpress. All.By.Myself. Without paying a designer. And I still don't think I know what I'm doing. But somehow I managed to go through all the steps to get it to where it is today. Oh and let me just say that Wordpress and I almost broke up a couple of times. I told Korey somedays it felt like I was walking into a BioChemistry class and being asked to take a test on something I knew nothing about! It was exhausting, people. And I still have a long list of things that need to be tweaked, added, or fixed on my blog. I see why blog designers charge the prices they do. You deserve it!
With all that said, join me as I blog here and at my new place, Serving Home!

Showing posts with label Food. Show all posts
Showing posts with label Food. Show all posts
Sunday, October 14, 2012

Wednesday, September 28, 2011
Peach Walnut Bread
Peaches and roasted walnuts tucked away in a delicious bread!
I was recently inspired to make this after a visit to the McKinney Farmers Market. I sometimes walk there, pushing Hunter in the jogging stroller, as part of my Saturday morning walk.
I came across a vendor who was selling all kinds of breads and after tasting his sample I knew I could recreate it.
Even though summer is technically over, peaches are still in full array at the grocery store.
First, I peeled, sliced, and diced 3 peaches.

Then I took one cup of chopped walnuts, laid them on a baking sheet, and put them in the oven while it was preheating to 350. When the oven beeps that the preheating time is over then you can remove your pan of walnuts. I tossed these with 1 tablespoon of real butter and a little bit of kosher salt.

After I diced the peaches, I mixed them in a bowl with some lemon juice, cinnamon and allspice. Gotta love how fall is an excuse to spice it up!

 |
| Peach Walnut Bread by kSk |
Peach Walnut Bread
2 cups all purpose flour
1 tsp baking soda
1/2 tsp salt (used solely on roasted walnuts)
1/2 cup butter, softened
3/4 cup brown sugar
4 T sour cream
2 eggs, beaten
1 T lemon juice
1 tsp cinnamon
1/2 tsp allspice
3 peaches, peeled, and diced
In a bowl mix the diced peaches with the lemon juice, cinnamon, and allspice. Set aside. In the bowl of your mixer, combine butter and brown sugar. Beat until creamy. Mix in sour cream and beaten eggs. In another bowl combine flour and baking soda and then slowly add in to batter. Fold in peaches and walnuts. Pour into greased loaf pan and bake for 60 minutes at 350.
Monday, September 26, 2011
Meal Planning Monday
Here's what's cooking up in our house this week:
Monday - Homemade macaroni and cheese and veggies
Tuesday - Roasted Chicken, Veggies, and Pasta with Homemade Alfredo Sauce
Wednesday - Leftovers
Thursday - Broiled Tilapia with Baked Sweet Potatoes
Friday - Pepperoni Stromboli (made with frozen bread dough)
Monday - Homemade macaroni and cheese and veggies
Tuesday - Roasted Chicken, Veggies, and Pasta with Homemade Alfredo Sauce
Wednesday - Leftovers
Thursday - Broiled Tilapia with Baked Sweet Potatoes
Friday - Pepperoni Stromboli (made with frozen bread dough)
Monday, September 12, 2011
Lunches: Round Two
From L to R: Animal cookie (Beechnut says it's junk-free), homemade chicken salad (made from leftover roasted chicken), grapes, banana bread, and then cheese crackers. The compartment on the left is empty. I ran out of ideas!
I haven't tried any liquidy foods in these yet like applesauce or yogurt. Knowing Hunter he would fling it everywhere and I'm just looking out for all parties involved.

I haven't tried any liquidy foods in these yet like applesauce or yogurt. Knowing Hunter he would fling it everywhere and I'm just looking out for all parties involved.

Amanda's Cheese Crackers
Homemade cheese crackers that are kid-friendly!
Because Hunter is my first child I'm super picky about everything he eats. I read labels. I examine costs. And then I determine that I don't want him eating stuff I can't pronounce.
Plus, I'm now having to make him good lunches twice a week that he can eat without help so I'm on a mission!
I found a recipe back in the DMN by a mom who makes her own cheese crackers. I made these a few months ago for Hunter and he loved them! I decided I needed to make them again to have on hand for his lunches. These are only 6 ingredients and probably would be easier if I had a food processor but since I don't I used my pastry blender to mix these up.
I mixed these up, rolled them out, and cut them all while talking to Korey. I guess that means it wasn't too time or mind-consuming.
I used my mini biscuit cutter to cut these out. They are about two inches in diameter. I was going to use something smaller to cut these but I couldn't find it. I tear these into pieces for his lunch since I'm not there to be in control/supervise. :)
 This is the finished product. My point and shoot is not good for food pictures.
 Here's the actual recipe with the link above to pretter pictures.
Amanda's Homemade Cheese Crackers
Ingredients
1 1/2 cups flour (all whole wheat or half whole wheat/half white)
3/4 stick cold butter cut into pieces
1 cup grated sharp cheddar
1 egg, beaten
3-4 tablespoons ice-cold water
1 teaspoon sea salt
Directions
Preheat oven to 400 F. Put flour in a food processor. Place the butter cubes around and pulse a couple of times until the butter is mixed in.
Reserve 1 tablespoon of the beaten egg for brushing on top and mix the rest into the flour. Add a few tablespoons of ice cold water, cheese and salt. Mix until dough forms.
Using a rolling pin, roll dough into 1/8 of an inch thickness. Cut out using whatever shape you want, or cut into strips.
Brush tops with beaten egg. Bake for 8-10 minutes until golden brown.
Cool and store in an air-tight container.
Amanda Dittlinger
Published in The Dallas Morning News on April 26, 2011
Because Hunter is my first child I'm super picky about everything he eats. I read labels. I examine costs. And then I determine that I don't want him eating stuff I can't pronounce.
Plus, I'm now having to make him good lunches twice a week that he can eat without help so I'm on a mission!
I found a recipe back in the DMN by a mom who makes her own cheese crackers. I made these a few months ago for Hunter and he loved them! I decided I needed to make them again to have on hand for his lunches. These are only 6 ingredients and probably would be easier if I had a food processor but since I don't I used my pastry blender to mix these up.
I mixed these up, rolled them out, and cut them all while talking to Korey. I guess that means it wasn't too time or mind-consuming.
I used my mini biscuit cutter to cut these out. They are about two inches in diameter. I was going to use something smaller to cut these but I couldn't find it. I tear these into pieces for his lunch since I'm not there to be in control/supervise. :)
This is the finished product. My point and shoot is not good for food pictures. Here's the actual recipe with the link above to pretter pictures.
Amanda's Homemade Cheese Crackers
Ingredients
1 1/2 cups flour (all whole wheat or half whole wheat/half white)
3/4 stick cold butter cut into pieces
1 cup grated sharp cheddar
1 egg, beaten
3-4 tablespoons ice-cold water
1 teaspoon sea salt
Directions
Preheat oven to 400 F. Put flour in a food processor. Place the butter cubes around and pulse a couple of times until the butter is mixed in.
Reserve 1 tablespoon of the beaten egg for brushing on top and mix the rest into the flour. Add a few tablespoons of ice cold water, cheese and salt. Mix until dough forms.
Using a rolling pin, roll dough into 1/8 of an inch thickness. Cut out using whatever shape you want, or cut into strips.
Brush tops with beaten egg. Bake for 8-10 minutes until golden brown.
Cool and store in an air-tight container.
Amanda Dittlinger
Published in The Dallas Morning News on April 26, 2011
Monday, September 5, 2011
My Square Meal
I recently discovered a news article on these and knew that it would be the perfect thing to use for Hunter's lunch when he goes to preschool. I actually bought it first for a bday gift. And for only $9.95 it was a fantastic deal. Plus, I didn't order them directly from the website because I'm cheap and didn't want to pay shipping but I did find them at a Bedazzled store near my house. I never shop here because it's expensive boutique items. I thought the store might have these marked up above the $9.95 price I saw but I figured I would give it a shot. And they didn't...they were the same price!
For $9.95 I got the box, the painted name on the front, plus they gift wrapped one of them for me I gave out as a birthday gift. At no extra charge! Gotta love that. They also have lunch bags that will hold the boxes but Hunter had already gotten one for his bday so I'm using that.
Apparently the new trend on the internet is making your kids lunch into lunches with themes or using cookie cutters to make fun shapes. See here and here. I'm not sure how far I'll go in trying to be "that mom" but hey I'm not against making his lunch fun. What we do just to encourage our kids to eat!
Since Hunter is only 13 months old and doesn't even comprehend what a shape is and needs his food in small bites I thought he might still like to see his food in a fun container. Plus, I don't have to go searching for multiple containers to put his food in.
 Sorry for the flipped pics! There's cheese, waffle bites, cheerios, peas, bananas, and some roast beef on a tortilla that is cut up.
 He likes it! The spork came with it and he picked it up right away and started trying to use it.
 Haha this picture doesn't show Hunter throwing his food. I just know I'm getting a call on the first day!
 Did he eat all of this? No. Did he spit alot of it out? Yes, which is his newest thing if he's not throwing the food or trying to feed it to the dogs. But trust me, by dinner he usually eats a great meal because he's hungry by then.
For $9.95 I got the box, the painted name on the front, plus they gift wrapped one of them for me I gave out as a birthday gift. At no extra charge! Gotta love that. They also have lunch bags that will hold the boxes but Hunter had already gotten one for his bday so I'm using that.
Apparently the new trend on the internet is making your kids lunch into lunches with themes or using cookie cutters to make fun shapes. See here and here. I'm not sure how far I'll go in trying to be "that mom" but hey I'm not against making his lunch fun. What we do just to encourage our kids to eat!
Since Hunter is only 13 months old and doesn't even comprehend what a shape is and needs his food in small bites I thought he might still like to see his food in a fun container. Plus, I don't have to go searching for multiple containers to put his food in.
 Sorry for the flipped pics! There's cheese, waffle bites, cheerios, peas, bananas, and some roast beef on a tortilla that is cut up.
  He likes it! The spork came with it and he picked it up right away and started trying to use it.
  Haha this picture doesn't show Hunter throwing his food. I just know I'm getting a call on the first day!
  Did he eat all of this? No. Did he spit alot of it out? Yes, which is his newest thing if he's not throwing the food or trying to feed it to the dogs. But trust me, by dinner he usually eats a great meal because he's hungry by then.
 Sunday, August 21, 2011
Hunter Ate This....
...Crockpot Chicken Taco Chili (Korey approved) and he looked like this.
 Take note of the "shelf" on his belly that is holding leftovers.

 Take note of the "shelf" on his belly that is holding leftovers.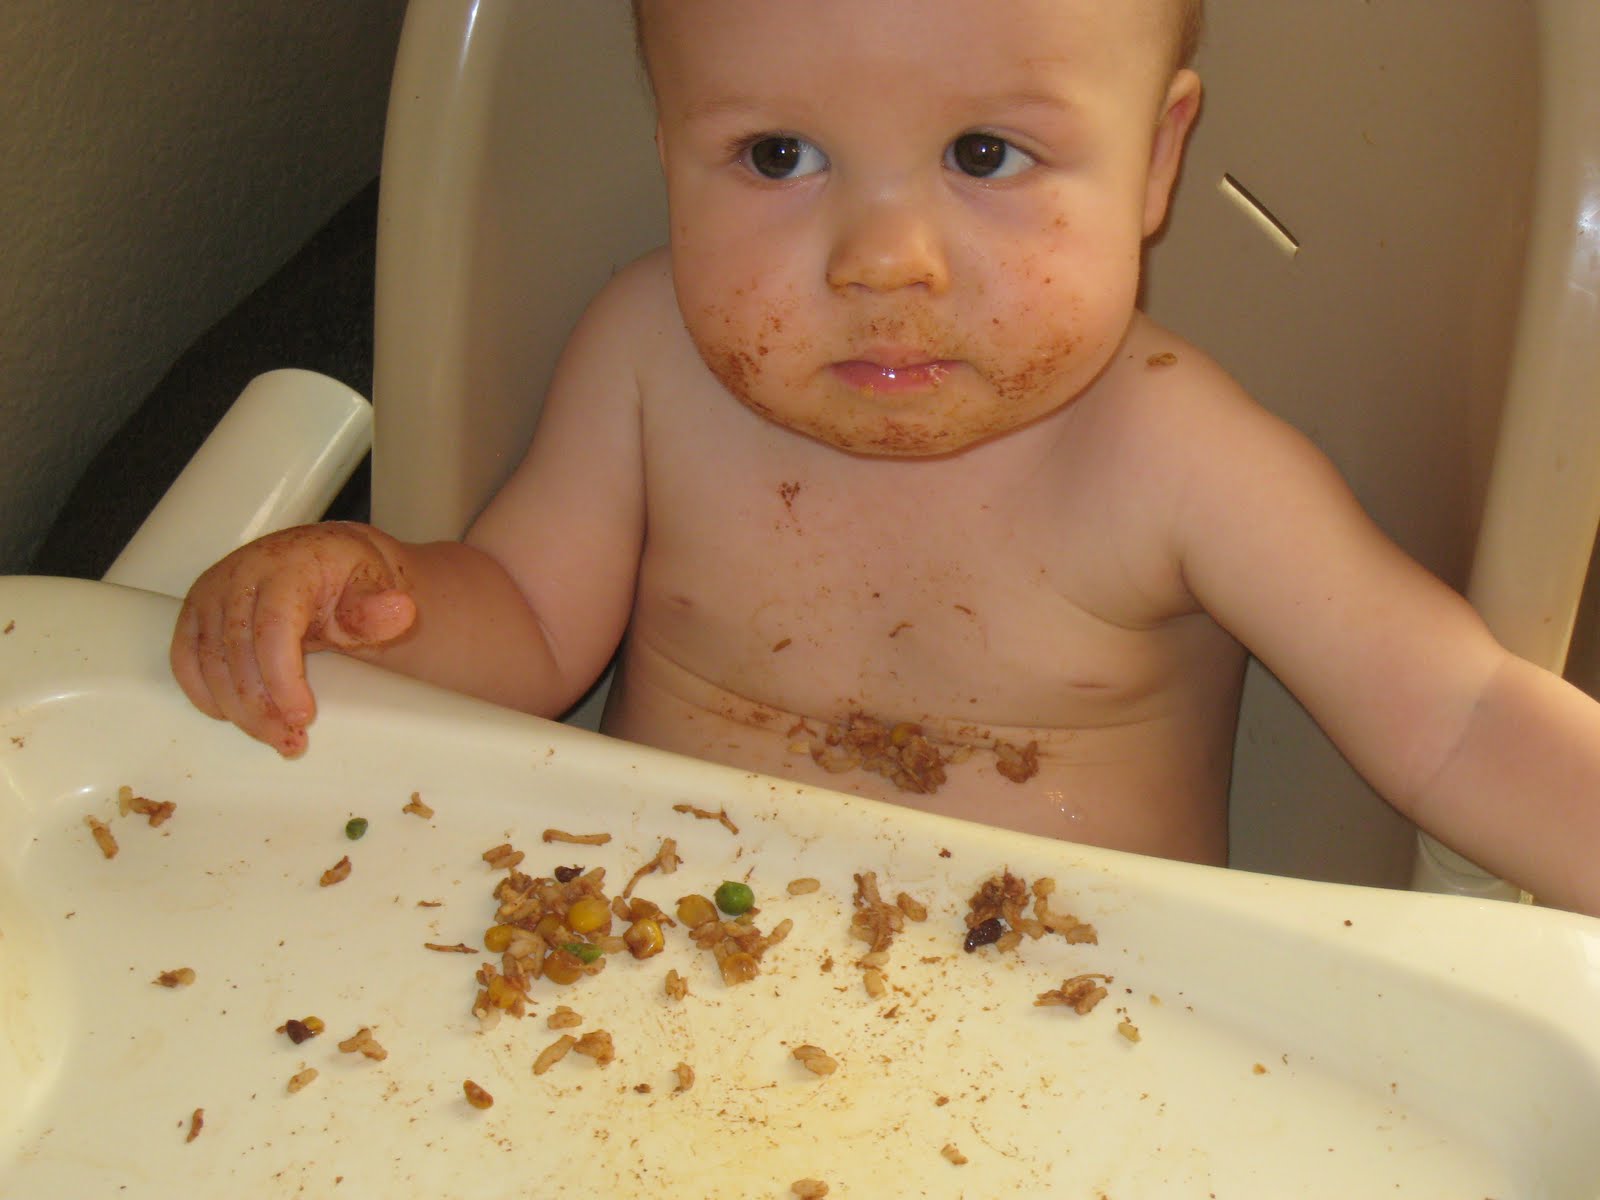
Sunday, July 11, 2010
Our Last Baby Shower - Animals and Outdoors
We had our last shower on July 3 and we had several family and friends come up for it. Again, it was held at my parent's house which was awesome because that was the second shower in a row they had held there AND their house is the best place to host parties.
This is on the back porch. Korey is holding our nephew Brandon. His brother and our SIL came up for the weekend.
 The fabulous food! There were sliders, veggie/dip cups, chicken and pineapple skewers...
 pb&j sandwiches for the kids (cut out like stars!) and chips and dip.
 Here is the drink station. The blue stuff is blue koolaid mixed with ginger ale. Notice the tablecloth flapping? The wind was picking up due to the approaching storm.
 The cute animal cutouts which I stole after the shower and we are going to put into Hunter's room.
 All the gifts which eventually had to be moved inside once it started raining.
 The happy couple! Plus one (not two like some people think).
 Sand buckets held the dips....
 and the fruit.
 Here is everyone eating outside. Thankfully, we were able to be outside for a couple of hours before the rain came.
 One of the games we played which was guessing the baby food. You could taste it and smell it. I did horrible on this game.
 Guess the chocolate bar melted into the diaper. I know my chocolate!
 My SIL...
 Fabian, the minister who married us, is testing out his chocolate knowledge.

This is on the back porch. Korey is holding our nephew Brandon. His brother and our SIL came up for the weekend.
 The fabulous food! There were sliders, veggie/dip cups, chicken and pineapple skewers...
 pb&j sandwiches for the kids (cut out like stars!) and chips and dip.
 Here is the drink station. The blue stuff is blue koolaid mixed with ginger ale. Notice the tablecloth flapping? The wind was picking up due to the approaching storm.
 The cute animal cutouts which I stole after the shower and we are going to put into Hunter's room.
 All the gifts which eventually had to be moved inside once it started raining.
 The happy couple! Plus one (not two like some people think).
 Sand buckets held the dips....
 and the fruit.
 Here is everyone eating outside. Thankfully, we were able to be outside for a couple of hours before the rain came.
 One of the games we played which was guessing the baby food. You could taste it and smell it. I did horrible on this game.
 Guess the chocolate bar melted into the diaper. I know my chocolate!
 My SIL...
 Fabian, the minister who married us, is testing out his chocolate knowledge.
The kids enjoyed the pool.
 Becky, Fabian's wife and Christry sitting outside pre-rain.
 And here are the clouds rolling in.
 At this point the party had to be moved inside. Here is the dessert station in the kitchen.
 The yummy cupcakes which my sister perfected!
 The diaper cake my SIL made me.
 Korey and I opening gifts.
 My SIL loving on her son (our nephew) Brandon. Korey's brother Kevin is sitting behind them.
 Korey and I opening more gifts.
 We had a fabulous time and we're so grateful to our family and friends for their support! And thanks to my sister, my SIL, and friend Regina for putting together such an awesome shower.
 Becky, Fabian's wife and Christry sitting outside pre-rain.
 And here are the clouds rolling in.
 At this point the party had to be moved inside. Here is the dessert station in the kitchen.
 The yummy cupcakes which my sister perfected!
  The diaper cake my SIL made me.
 Korey and I opening gifts.
 My SIL loving on her son (our nephew) Brandon. Korey's brother Kevin is sitting behind them.
 Korey and I opening more gifts.
 We had a fabulous time and we're so grateful to our family and friends for their support! And thanks to my sister, my SIL, and friend Regina for putting together such an awesome shower.
Monday, June 14, 2010
Church Baby Shower: Candy Theme
On Saturday the girls from my Sunday school class at church hosted a shower for me and Leslie at Shay's house. Our due dates are only a week apart. She is having a girl and I'm having a boy!
The name signs decorating the mantel. These are so cute! Thanks, Erika!
 This was sooo cute and I don't know if I would ever attempt it! But I know who to pay to make me one! Thanks, Lori!
 The invitation cutely framed and made by Andrea.
 The candy theme decorations.


 The lollipop bouquet! And I guess I didn't get a close-up of the cupcakes but they are in the background. They are decorated with a H and an A.
 Me and my mom.
 In the rest of the pics I'm sitting on the other side of the room on the couch opening great gifts!


 Thank you all for an awesome shower!
The name signs decorating the mantel. These are so cute! Thanks, Erika!
 This was sooo cute and I don't know if I would ever attempt it! But I know who to pay to make me one! Thanks, Lori!
 The invitation cutely framed and made by Andrea.
 The candy theme decorations.

 The lollipop bouquet! And I guess I didn't get a close-up of the cupcakes but they are in the background. They are decorated with a H and an A.
 Me and my mom.
 In the rest of the pics I'm sitting on the other side of the room on the couch opening great gifts!


 Thank you all for an awesome shower!
Thursday, March 25, 2010
Taquitos!!
My sister sent me this recipe and I made it for dinner tonight. I didn't take any pics to show you but there is a pic on the website including how-to photos. I served it with sour cream, guacamole, and salsa. Something different and yum! And they are baked, not fried so you can eat healthy!
Thursday, February 11, 2010
Beef: It's What's for Dinner
According to babycenter.com our baby is now the size of an avocado. Which happens to be Korey's favorite food. So in honor of Avocado Week I made beef enchiladas which we topped with slices of avocado.
I RARELY ever eat enchiladas in a Mexican restaurant. I prefer them homemade. But my mom has a couple of recipes that I love so I decided to make the beef one since I had all of the ingredients except for the tortillas.
Here I have sauteed onion and one jalapeno. This will make up part of the contents of the meat mixture. I used half an onion. I only used one jalapeno because I wanted it to stay mild so as not to upset my pregnant belly.
 Here I have browned one pound of beef and added taco seasoning with the required water. This is mixed in with the onion and jalapeno mix.
 For the sauce mix I have one cup of sour cream, one soup can of milk, and one can of cream of chicken.

My mom's recipe calls for Velveeta but a) it's expensive and b) I'm anti-Velveeta since it's processed cheese. Although I did eat it in queso dip on Superbowl Sunday. Oh well. Here I've substituted lots of cheese! This is cheddar and I usually buy it in huge blocks because we love cheese and use it alot. I shredded up the rest of this block and mixed all the sauce ingredients together. You could buy bagged, shredded cheese for convenience sake but the block cheese tastes much fresher when you grate it.
 Here's what the finished sauce looks like. Creamy goodness!
 I set the sauce aside and started to fill my tortillas with the beef mixture. Note that I added in black beans because I had them and they're good for you. But you can add anything you want. It's all good. See the huge bag of homemade corn tortillas in the background? Only $3 at the Mexican supermarket! They also have flour tortillas but they only have ten in the bag and I wanted to have extras for later.
 What you can't see in this final picture is that my corn tortillas started breaking when I tried to roll them even though I heated them up. So I had to scrap the single, rolled enchilada idea and make it into enchilada bake. Which means I basically layered meat and tortillas until I ran out of meat. I then topped it off with the sauce. I also forgot to add the cilantro I had to the meat mixture so I sprinkled some on top which I didn't show you.
 I also took a handful of corn tortillas, cut them into fourths with a pizza cutter, and made chips out of them. These were awesome!
I RARELY ever eat enchiladas in a Mexican restaurant. I prefer them homemade. But my mom has a couple of recipes that I love so I decided to make the beef one since I had all of the ingredients except for the tortillas.
Here I have sauteed onion and one jalapeno. This will make up part of the contents of the meat mixture. I used half an onion. I only used one jalapeno because I wanted it to stay mild so as not to upset my pregnant belly.
 Here I have browned one pound of beef and added taco seasoning with the required water. This is mixed in with the onion and jalapeno mix.For the sauce mix I have one cup of sour cream, one soup can of milk, and one can of cream of chicken.
My mom's recipe calls for Velveeta but a) it's expensive and b) I'm anti-Velveeta since it's processed cheese. Although I did eat it in queso dip on Superbowl Sunday. Oh well. Here I've substituted lots of cheese! This is cheddar and I usually buy it in huge blocks because we love cheese and use it alot. I shredded up the rest of this block and mixed all the sauce ingredients together. You could buy bagged, shredded cheese for convenience sake but the block cheese tastes much fresher when you grate it.
 Here's what the finished sauce looks like. Creamy goodness!
 I set the sauce aside and started to fill my tortillas with the beef mixture. Note that I added in black beans because I had them and they're good for you. But you can add anything you want. It's all good. See the huge bag of homemade corn tortillas in the background? Only $3 at the Mexican supermarket! They also have flour tortillas but they only have ten in the bag and I wanted to have extras for later.
 What you can't see in this final picture is that my corn tortillas started breaking when I tried to roll them even though I heated them up. So I had to scrap the single, rolled enchilada idea and make it into enchilada bake. Which means I basically layered meat and tortillas until I ran out of meat. I then topped it off with the sauce. I also forgot to add the cilantro I had to the meat mixture so I sprinkled some on top which I didn't show you.
 I also took a handful of corn tortillas, cut them into fourths with a pizza cutter, and made chips out of them. These were awesome!
Here is my mom's original recipe:
2 lb hamburger & onion
1 pkg taco seasoning
3/4 c. water
tortillas
1 can cream of chick soup
1 soup can of milk
1 cup sour cream
1 lb. velveeta cheese
Brown meat and onion. Add taco seasoning and water. Simmer until water cooks up. Roll mixture in softened tortillas. Combine rest of ingredients and heat until cheese melts -- pour over enchiladas. Bake @325 for 30 minutes.


Subscribe to:
Posts (Atom)